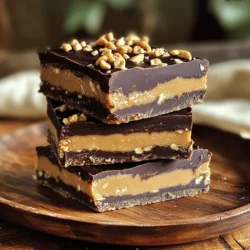
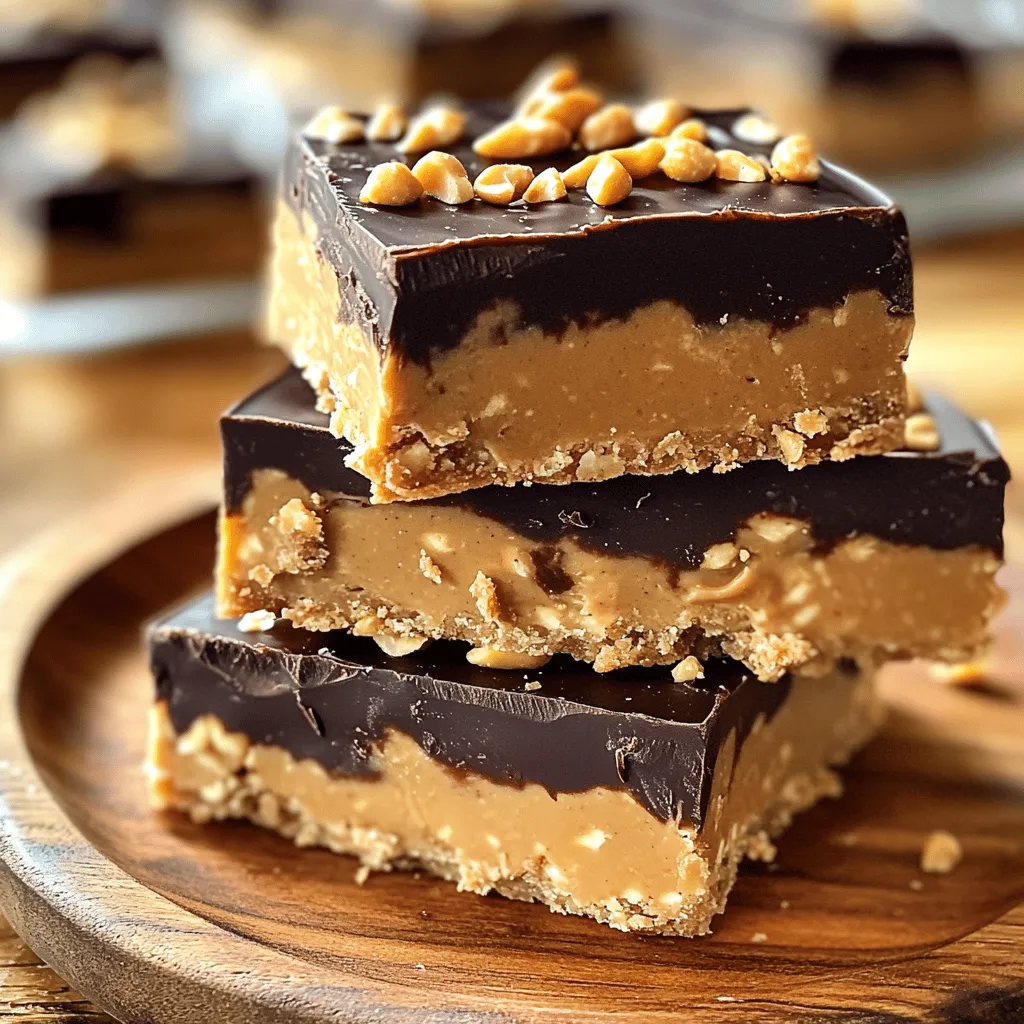
Craving a sweet treat that’s easy to whip up? Look no further! My No-Bake Chocolate Peanut Butter Bars are simple, tasty, and perfect for satisfying your sweet tooth. With just a few pantry staples, you can create a delicious dessert that requires zero baking. Ready to impress your friends and family? Let’s dive into the ingredients and make these delightful bars together!
Ingredients
List of Ingredients
– 1 cup creamy peanut butter
– 1/2 cup honey or maple syrup
– 2 cups rolled oats
– 1/2 cup dark cocoa powder
– 1 teaspoon vanilla extract
– 1/4 teaspoon salt
– 1/2 cup dark chocolate chips
– 1/4 cup chopped peanuts
To make these no-bake chocolate peanut butter bars, you will need a few simple ingredients. The base starts with creamy peanut butter, which gives a rich flavor and smooth texture. Honey or maple syrup adds sweetness and binds everything together.
Rolled oats provide a chewy texture, while dark cocoa powder gives a deep chocolate taste. A touch of vanilla extract enhances the flavors, and salt balances the sweetness. Dark chocolate chips add extra chocolatey goodness, and chopped peanuts give a nice crunch on top.
Optional Ingredients for Customization
– Maple syrup alternatives
– Nut butter substitutions
You can swap out honey for agave or brown rice syrup if you need a different sweetener. If you want to change the flavor, try using almond or cashew butter instead of peanut butter. These options keep the bars tasty and allow for personal twists.
Equipment Needed
– 8-inch square baking dish
– Parchment paper
– Mixing bowls
– Spatula
Make sure to have an 8-inch square baking dish ready. Lining it with parchment paper helps with easy removal of the bars. You will also need mixing bowls to combine your ingredients and a spatula to press everything down smoothly.
These tools make preparing the bars easy and fun.
Step-by-Step Instructions
Preparation Steps
– Line the baking dish with parchment paper.
– Combine peanut butter and honey or maple syrup in a bowl.
Start by taking an 8-inch square baking dish. Use parchment paper to line it. This helps with easy removal later. Let some paper hang over the edges. Next, in a large mixing bowl, add 1 cup of creamy peanut butter. Pour in 1/2 cup of honey or maple syrup. Stir well until the mix is smooth and creamy.
Mixing Instructions
– Add oats, cocoa powder, vanilla, and salt.
– Fold in chocolate chips.
Now it’s time to add flavor and texture. Toss in 2 cups of rolled oats. Add 1/2 cup of dark cocoa powder, 1 teaspoon of vanilla extract, and 1/4 teaspoon of salt. Mix thoroughly until everything is well combined. You will get a thick, sticky dough. Don’t forget to fold in 1/2 cup of dark chocolate chips. This will give you little pockets of sweetness!
Setting the Bars
– Pour and press mixture into the baking dish.
– Top with chopped peanuts and refrigerate.
Pour the mixture into your lined baking dish. Use a spatula to press it down evenly. Make sure to fill all the corners. This helps the bars hold their shape. Next, sprinkle chopped peanuts on top. Gently press them into the mixture. Now, place the dish in the fridge. Let it chill for at least 2 hours, or until firm. You want the bars to be nice and set before cutting.
Tips & Tricks
Tips for Perfecting Your Bars
– Mix all ingredients well to avoid clumps.
– Press the mixture firmly in the dish for a compact bar.
Getting the right texture is key. If you don’t mix well, you might find dry oats in your bars. The mixture should be thick and sticky. When pressing it down, think of it like making a pizza crust. The firmer, the better.
Common Mistakes to Avoid
– Don’t skip the chilling time; it helps the bars set.
– Always use parchment paper for easy removal.
A common mistake is cutting the bars too soon. They need time to chill and harden. If you don’t use parchment paper, removing the bars will be messy. It’s worth the extra step for clean cuts.
Serving Suggestions
– Cut into small squares for easy sharing at parties.
– Try topping with melted chocolate or extra peanuts.
For parties, arrange the bars on a nice plate. You can drizzle some melted chocolate on top to make them look fancy. Adding chopped peanuts gives a nice crunch. These tips make your no-bake chocolate peanut butter bars even more appealing.
Variations
Flavor Variations
You can change the taste of your no-bake chocolate peanut butter bars in fun ways. Adding coconut flakes gives a tropical twist. Just mix in half a cup of unsweetened coconut flakes when you blend the oats. This adds a chewy texture and a fresh flavor.
Another option is to use white chocolate chips instead of dark chocolate chips. This gives a sweeter taste and a nice color contrast. Melt the white chocolate and drizzle it on top for a tasty finish.
Dietary Alternatives
If you follow a gluten-free diet, use certified gluten-free oats. This ensures your bars stay safe and tasty. Just swap regular oats for the certified ones in the recipe.
For a vegan option, replace honey with maple syrup. This keeps the sweetness while making it plant-based. You can also use agave nectar as another option.
Themed Variations
Make your bars festive with holiday-themed toppings. Try crushed candy canes for Christmas or colored sprinkles for birthdays. You can also add pumpkin spice in the fall to match the season.
Incorporating seasonal flavors can elevate your bars. Use fresh berries in the summer or chopped apples with cinnamon in the fall. These additions keep your treats fresh and exciting.
Storage Info
How to Store Leftover Bars
To keep your No-Bake Chocolate Peanut Butter Bars fresh, place them in an airtight container. This prevents air from getting in and keeps them tasty. Store the bars in the fridge for up to one week. This helps maintain their firm texture and rich flavor.
Freezing Instructions
If you want to save some bars for later, freezing is a great option. Wrap each bar tightly in plastic wrap or place them in an airtight freezer bag. They can last for up to three months in the freezer. When you’re ready to enjoy them, take them out and let them thaw in the fridge for a few hours. This keeps them from getting too soft.
Shelf Life
In the fridge, these bars last about one week. Keep an eye on them for any signs of spoilage. If you see mold or a change in color, it’s best to toss them. Enjoy your sweet treat while it’s fresh!
FAQs
Can I use natural peanut butter?
Yes, you can use natural peanut butter. It works well in this recipe. Just make sure it is creamy and not too dry. Natural peanut butter may separate, so stir it well before using. This will help it blend into the mix easily.
How long do these bars take to set?
These bars need to chill for at least 2 hours. This chilling time helps them firm up and hold their shape. If you want them extra firm, consider chilling them longer. Just be sure to cover them well in the fridge to avoid drying out.
Can I adjust the sweetness level?
Absolutely! You can adjust the sweetness to your taste. If you prefer less sweetness, reduce the honey or maple syrup. You can also add a bit of cocoa powder to balance the flavors. Taste the mixture before pressing it into the dish, and tweak it as you like.
You now know how to make delicious peanut butter cocoa bars. We covered all the ingredients needed, plus tips for mixing and setting. You learned how to store them properly and even customize the recipe to fit your taste. These bars are easy and fun to make for events or a quick snack. Enjoy sharing them with friends or family. Simple steps and tasty results make this a must-try recipe!