Are you looking for a delicious snack that everyone can enjoy? My nut-free granola bars are the perfect answer! Packed with healthy ingredients and easy to make, these bars can satisfy your cravings without worry. Whether you’re avoiding nuts for allergies or just want a wholesome treat, this recipe has you covered. Let’s dive in and make a snack you’ll love!
Ingredients
Key Ingredients for Nut-Free Granola Bars
The main items for nut-free granola bars are simple and easy to find. You will need:
– 2 cups rolled oats
– 1/2 cup puffed rice cereal
– 1/2 cup sunflower seeds
– 1/2 cup pumpkin seeds
– 1/2 cup honey or maple syrup
– 1/4 cup coconut oil, melted
– 1 teaspoon vanilla extract
– 1/2 teaspoon cinnamon
– 1/2 cup mini chocolate chips (dairy-free if desired)
– A pinch of salt
These ingredients come together to create a tasty snack. Oats provide texture and fiber. The seeds add crunch and protein, while honey or maple syrup give sweetness and moisture.
Optional Add-Ins for Flavor and Texture
You can easily customize your granola bars. Here are some fun add-ins you might enjoy:
– Dried fruits (like cranberries or raisins)
– Flaxseeds or chia seeds
– Coconut flakes
– Spice variations (like nutmeg or ginger)
These add-ins can change the taste and texture. Mix and match to find your favorite combination.
Nutritional Information Overview
Nut-free granola bars are a balanced snack. They offer healthy fats, protein, and fiber. Each serving contains:
– Calories: About 180
– Protein: 4g
– Carbohydrates: 28g
– Fat: 7g
– Fiber: 3g
These bars give energy and keep you full. They are great for a quick breakfast or a midday snack. Enjoy them anytime!
Step-by-Step Instructions
Preparation and Baking Steps
Start by preheating your oven to 350°F (175°C). This helps get your bars nice and crispy. Next, line an 8×8 inch baking dish with parchment paper. Leave some paper hanging over the sides. This makes it easy to lift the bars out later. In a big mixing bowl, add the rolled oats, puffed rice cereal, sunflower seeds, pumpkin seeds, and cinnamon. Mix these dry ingredients together well. In another small bowl, whisk together the honey or maple syrup, melted coconut oil, vanilla extract, and a pinch of salt. Pour this wet mixture over your dry mix. Stir until everything is coated. Fold in the mini chocolate chips gently. Now, transfer this mixture to your baking dish. Press it down firmly using a spatula or your hands. This helps the bars hold together while baking. Bake for 20-25 minutes, until the edges turn golden brown.
Tips for Mixing and Compaction
When mixing, make sure to coat all dry ingredients well. This ensures every bite is tasty. Use your hands to compact the mixture in the pan. The firmer you press, the better the bars will hold together. If the mixture feels too dry, you can add a touch more honey or oil. This will help bind everything better. Remember, mixing too much can break the puffed cereal. So, be gentle when folding in the chocolate chips.
Cooling and Cutting the Bars
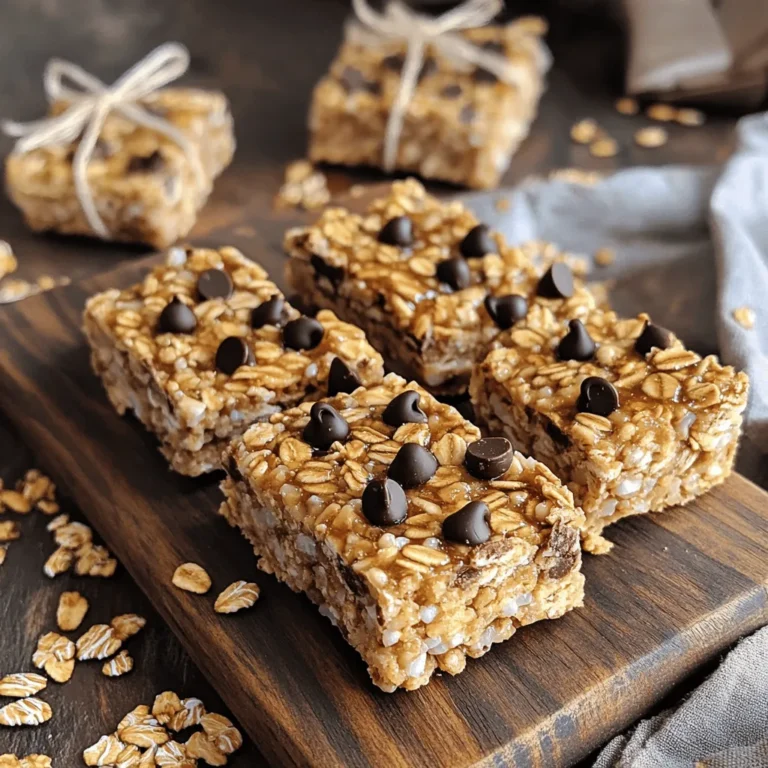
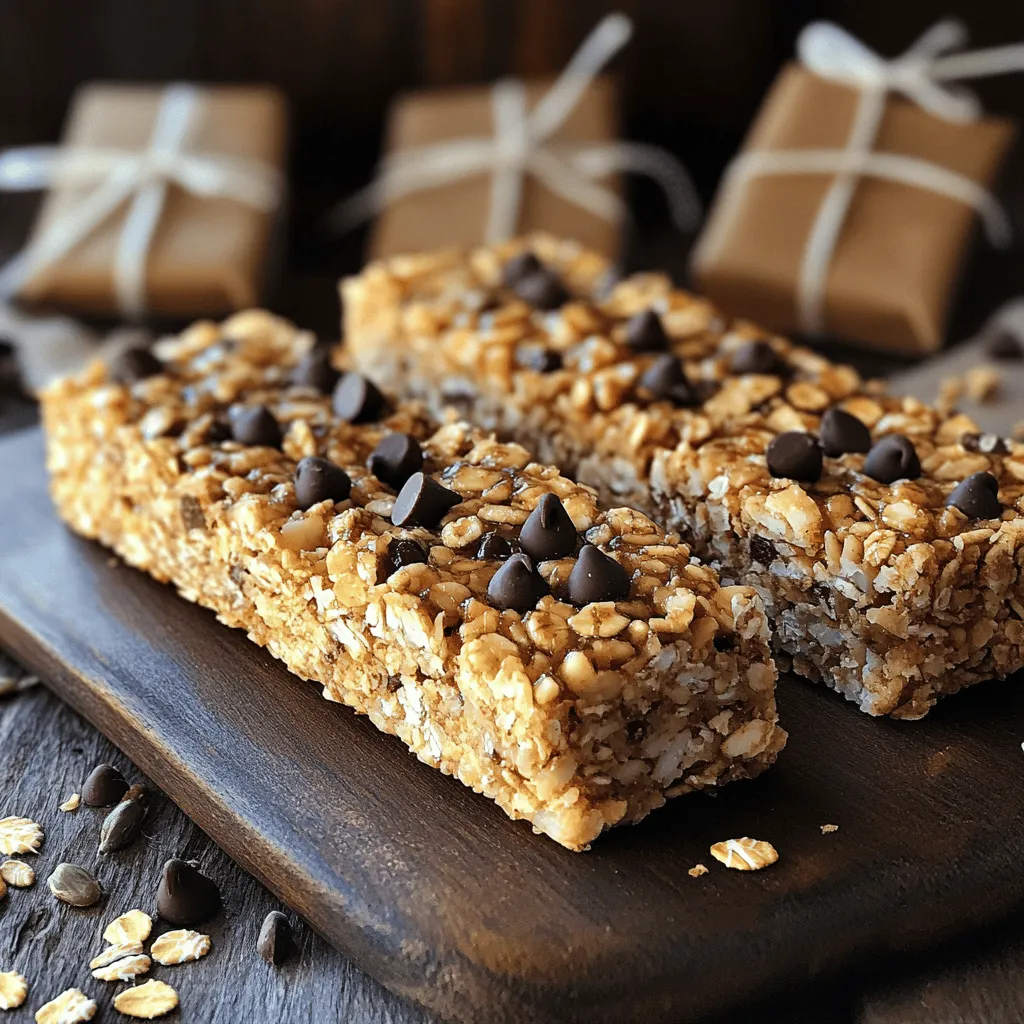
Once baked, take the pan out of the oven. Let the bars cool in the pan for about 10 minutes. Use the parchment paper to lift them out and let them cool on a wire rack. This cooling step is important. It helps the bars firm up. Once they are cool, use a sharp knife to cut them into bars or squares. You can cut them into any size you like. For a fun touch, arrange the bars on a wooden board. Sprinkle some extra chocolate chips and seeds on top for a nice look. Enjoy these bars as a healthy snack!
Tips & Tricks
Common Mistakes to Avoid
When making nut-free granola bars, avoid using too much liquid. This can make the bars soggy. Also, ensure you press the mixture firmly in the pan. If you don’t compact it well, the bars may crumble when cut. Lastly, be careful with baking time. Overbaking can lead to tough bars, while underbaking may cause them to fall apart.
Best Practices for Flavor Enhancements
To enhance flavor, try adding a pinch of sea salt. It brings out the sweetness of the honey or maple syrup. You can also mix in dried fruits like cranberries or raisins for a chewy texture. Experiment with spices too! A dash of nutmeg or ginger can add warmth to the bars. Use high-quality chocolate chips for a richer taste.
How to Achieve Perfect Texture
The right texture is key for great granola bars. Use a mix of rolled oats and puffed rice cereal for crunch. Adding seeds like sunflower and pumpkin gives a nice bite. The coconut oil helps bind everything without making it greasy. After baking, let them cool completely before cutting. This step ensures they hold their shape. Follow these tips for a perfect snack every time!
Variations
Different Flavor Profiles to Try
You can easily change the taste of your nut-free granola bars. Try adding dried fruit like cranberries or apricots. These fruits add sweetness and a chewy texture. You can also use spices like nutmeg or ginger for a warm flavor. For a tropical twist, add shredded coconut or banana chips.
Substitutions for Ingredients
Sometimes, you may not have all the ingredients on hand. If you don’t have sunflower seeds, use sesame seeds instead. You can swap pumpkin seeds for chia seeds for a different crunch. If you want a sweeter taste, use agave syrup in place of honey or maple syrup. This gives you more options to fit your pantry.
Creating Chewy vs. Crunchy Bars
Want chewy bars? Add more honey or maple syrup to make them stickier. This helps hold the mixture together. For crunchier bars, bake them a bit longer until the edges turn golden brown. You can also use less syrup and increase the oats for a firm texture. Adjusting these elements can help you find your perfect snack.
Storage Info
Recommended Storage Methods
To keep your nut-free granola bars fresh, store them in an airtight container. You can use a glass or plastic container with a tight lid. If you want, you can also wrap each bar in parchment paper. This method makes it easy to grab a snack on the go.
How Long Do They Last?
When stored properly, these granola bars last about a week at room temperature. If you put them in the fridge, they can last up to two weeks. Just check for any signs of spoilage, like off smells or changes in texture.
Freezing for Long-Term Storage
If you want to store them for longer, freezing is a great option. Wrap the bars tightly in plastic wrap, then place them in a freezer bag. They can last for up to three months in the freezer. When you’re ready to eat one, just take it out and let it thaw at room temperature. You can even microwave it for a few seconds for a warm treat.
FAQs
Are granola bars healthy?
Yes, granola bars can be healthy. They provide energy and nutrients. My nut-free granola bars use oats, seeds, and honey. These ingredients give you fiber and healthy fats. They are a great snack for kids and adults. Just watch the sugar content in store-bought bars. Making them at home lets you control the ingredients.
Can I use different sweeteners?
Yes, you can! Honey and maple syrup work well in this recipe. You can also try agave syrup or brown rice syrup. Each sweetener will give a unique taste. Just keep the amount the same as the recipe states. This way, your bars will still hold together.
How to make nut-free granola bars without oats?
You can make nut-free granola bars without oats by using puffed rice or quinoa flakes. These grains will still give you that chewy texture. Substitute the oats with 2 cups of puffed rice cereal. Then, follow the same steps in the recipe. You will have a tasty, nut-free snack!
Where to buy nut-free granola bars?
You can find nut-free granola bars at many grocery stores. Look in the snack aisle or health food section. Some stores have special sections for allergy-friendly foods. You can also shop online. Brands often label their products as nut-free. Always check the label to ensure they meet your needs.
In this article, we explored making nut-free granola bars from scratch. We discussed key ingredients, optional add-ins, and their nutritional values. You learned step-by-step instructions for prep, baking, cooling, and cutting. We shared tips to avoid common mistakes and enhance flavor.
Finally, you discovered different flavor profiles and storage information. Making granola bars at home lets you control ingredients and flavors. Enjoy experimenting with variations that fit your taste and needs. Now, you have the tools to create delicious, nut-free snacks!

