WANT TO SAVE THIS RECIPE?
Craving a sweet, creamy treat that’s easy to make? These No-Bake Oreo Cheesecake Cups are perfect for you! With just a few simple ingredients, you can whip up a delightful dessert that will impress friends and family alike. Imagine crushed Oreos, smooth cream cheese, and a rich, velvety filling in every bite. In this post, I’ll guide you step-by-step to create these tasty cups that are sure to be a hit!
Why I Love This Recipe
- Decadent Flavor: The rich combination of cream cheese and Oreo creates a luscious, indulgent dessert that satisfies any sweet tooth.
- No Baking Required: This recipe is perfect for warm days or when you want to save time, as there’s no oven needed!
- Customizable Toppings: You can easily personalize this dessert with your favorite toppings, whether it’s more Oreos, chocolate chips, or fresh fruit.
- Perfect for Any Occasion: These cheesecake cups are great for parties, celebrations, or just a cozy night in, making them a versatile treat.
Ingredients
Main Ingredients
– 20 Oreo cookies, crushed (plus extra for garnish)
– 8 oz cream cheese, softened
– 1 cup heavy whipping cream
Additional Ingredients
– 1/2 cup granulated sugar
– 4 tablespoons unsalted butter, melted
– 1 teaspoon vanilla extract
Optional Ingredients
– 1/2 teaspoon powdered sugar (for sweetness)
– 1/4 cup chocolate chips or Oreo crumbs for topping
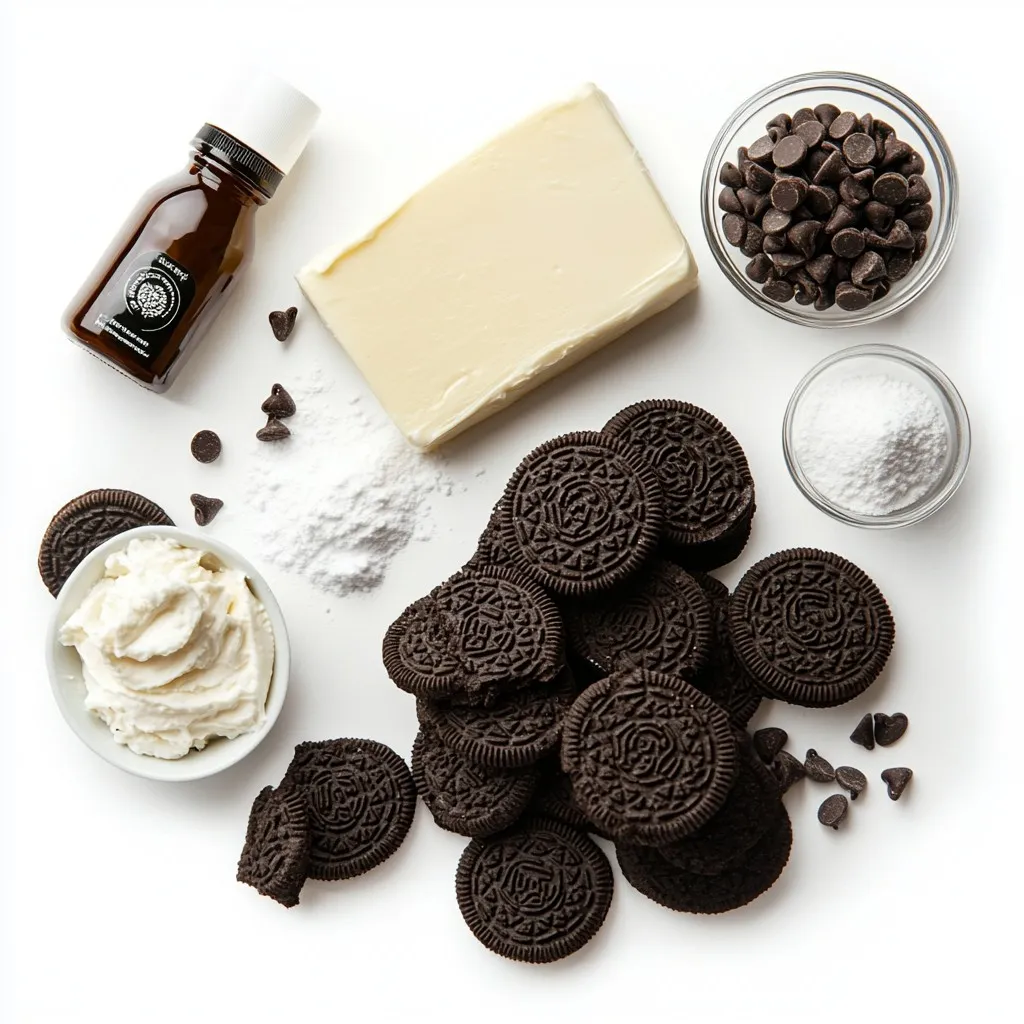
To make No-Bake Oreo Cheesecake Cups, you need just a few key ingredients. First, the Oreo cookies form the base and add that rich flavor. You will crush 20 cookies and mix them with butter. This mixture creates a firm crust in each cup.
Next, you will need cream cheese. Use 8 oz of softened cream cheese for a smooth texture. This is essential for the filling. The heavy whipping cream is also important. You’ll need 1 cup. Whipping it makes the filling light and fluffy.
For sweetness, add granulated sugar. You need 1/2 cup to balance the cream cheese. A touch of vanilla extract, about 1 teaspoon, adds warmth to the flavor.
You can also use some optional ingredients. If you want a sweeter filling, add 1/2 teaspoon of powdered sugar while whipping the cream. For garnish, consider using 1/4 cup of chocolate chips or extra Oreo crumbs. These add a nice touch and extra flavor.
With these ingredients, you can make a delightful treat that impresses everyone!

Step-by-Step Instructions
Preparing the Crust
– Combine crushed Oreos with melted butter in a bowl.
– Mix until the cookies are well coated with the butter.
– Spoon about 2 tablespoons of this mixture into each serving cup.
– Press the mixture down to create a firm base.
Making the Cheesecake Filling
– In a large bowl, beat the softened cream cheese, sugar, and vanilla until smooth.
– Use a hand mixer to blend until creamy.
– In a separate bowl, whip the heavy cream until soft peaks form.
– If you want it sweeter, add powdered sugar while whipping.
– Gently fold the whipped cream into the cream cheese mixture.
– Be careful not to deflate the whipped cream while mixing.
Assembling the Cups
– Spoon the cheesecake filling over the crust in each cup.
– Fill each cup to about 3/4 full.
– Top each cheesecake cup with extra crushed Oreos or chocolate chips.
– Chill the cups in the fridge for at least 4 hours until set.
Tips & Tricks
Achieving a Creamy Texture
Softening the cream cheese is key. It helps blend smoothly with sugar and vanilla. Leave it out for about 30 minutes before mixing. This makes it easy to whip. When you fold the whipped cream, do it gently. Use a spatula and lift from the bottom. This keeps air in the cream, giving you that light texture.
Timing for Refrigeration
Chill your cheesecake cups for at least 4 hours. This allows the flavors to meld and the filling to set. You’ll know they are ready when they feel firm to the touch. The top should not jiggle when you move them.
Presentation Suggestions
Garnish each cup with a dollop of whipped cream. Add a mini Oreo on top for a fun touch. You can also sprinkle extra crushed Oreos or chocolate chips for extra flair. Serve on a colorful plate to make it pop at your table.
Pro Tips
- Use Room Temperature Cream Cheese: Make sure your cream cheese is at room temperature before mixing. This will help achieve a smoother, creamier texture for your cheesecake filling.
- Chill Thoroughly: Allow the cheesecake cups to chill in the refrigerator for at least 4 hours, or overnight if possible, to ensure they set properly and the flavors meld together beautifully.
- Experiment with Toppings: Feel free to get creative with toppings! Consider adding caramel sauce, whipped cream, or even fresh berries for a unique twist on the classic Oreo flavor.
- Make Ahead: These cheesecake cups can be made a day in advance, making them a perfect dessert for gatherings. Just cover them tightly in the refrigerator until you’re ready to serve.

Variations
Flavor Variations
You can get creative with flavors in your No-Bake Oreo Cheesecake Cups. Try using Golden Oreos instead of regular ones. They add a nice twist with their vanilla taste. You can also add flavored extracts like mint or almond. Just a drop or two can change the whole vibe of your dessert. Experimenting with flavors makes each cup unique!
Toppings and Mix-ins
Toppings can take your cheesecake cups to the next level. Consider using different kinds of chocolate toppings like dark chocolate or white chocolate. They add richness and a fun look. You can also mix in some fruit or candy pieces. Chopped strawberries, raspberries, or even mini chocolate bars work great. These additions bring extra flavor and texture.
Serving Size Adjustments
You can easily adjust the serving size of your cheesecake cups. Want fewer servings? Just cut the recipe in half. For more guests, double the ingredients. If you want something cute and fun, try making miniature versions. Use small cups or shot glasses for parties. These bite-sized treats are perfect for events and look adorable!
Storage Info
Refrigeration Tips
You can store the cheesecake cups in the fridge for up to five days. Keep them in an airtight container. This helps keep them fresh and tasty. If you want to avoid sogginess, place a piece of parchment paper between the lid and cups. This allows air to flow but keeps moisture out.
Freezing Instructions
Yes, you can freeze the cheesecake cups! To freeze, place each cup in a freezer-safe container. Make sure the lid is tight. They can last in the freezer for about three months. To thaw, move them to the fridge overnight. This keeps them smooth and creamy.
Long-term Storage Solutions
Use glass or plastic containers for the best long-term storage. Avoid metal containers, as they may change the taste. To prevent moisture and flavor loss, line the containers with wax paper. This helps keep the cups fresh longer.
FAQs
Can I use low-fat cream cheese?
Yes, you can use low-fat cream cheese. It will change the texture and taste a bit. The cheesecake may not be as rich and creamy. You might notice a lighter flavor. This option is great if you want fewer calories.
How long do No-Bake Oreo Cheesecake Cups last?
No-Bake Oreo Cheesecake Cups last about 3 to 5 days in the fridge. Store them in an airtight container. This helps keep them fresh and tasty. If you notice any off smells or changes in texture, it’s best to toss them.
Can I make these ahead of time?
Yes, you can make these cups a day or two ahead of time. This makes them perfect for parties or gatherings. Just cover and store them in the fridge until you’re ready to serve. The flavors will blend nicely, making them even more delicious!
This blog post covered how to make No-Bake Oreo Cheesecake Cups. We discussed key ingredients like Oreos, cream cheese, and heavy cream. I shared step-by-step instructions for preparing the crust and filling. You now know tips for achieving a creamy texture and ideas for variations.
In conclusion, these cheesecake cups are easy to make and delicious. They’re perfect for any gathering. Enjoy experimenting with flavors and toppings. Make them ahead of time for a stress-free trea
No-Bake Oreo Cheesecake Cups
Delicious and easy no-bake cheesecake cups made with Oreo cookies.
Prep Time 20 minutes mins
Total Time 4 hours hrs 20 minutes mins
Course Dessert
Cuisine American
Servings 6
Calories 250 kcal
- 20 cookies Oreo cookies, crushed (plus extra for garnish)
- 4 tablespoons unsalted butter, melted
- 8 oz cream cheese, softened
- 0.5 cup granulated sugar
- 1 teaspoon vanilla extract
- 1 cup heavy whipping cream
- 0.5 teaspoon powdered sugar (optional, for sweetness)
- 0.25 cup chocolate chips or Oreo crumbs for topping
In a medium bowl, combine the crushed Oreo cookies and melted butter. Mix until the cookies are well coated.
Spoon about 2 tablespoons of the cookie mixture into the bottom of each serving cup, pressing it down to create a firm base.
In a large mixing bowl, beat the softened cream cheese, granulated sugar, and vanilla extract using a hand mixer until smooth and creamy.
In a separate bowl, whip the heavy cream with an electric mixer until soft peaks form. If you desire a sweeter filling, add the powdered sugar during the whipping process.
Gently fold the whipped cream into the cream cheese mixture until well combined, being careful not to deflate the whipped cream.
Spoon the cheesecake mixture over the Oreo crust in each cup, filling to about 3/4 full.
Top each cheesecake cup with extra crushed Oreos or chocolate chips for garnish.
Refrigerate the cheesecake cups for at least 4 hours or until set.
Once set, serve chilled and enjoy the delightful layers of Oreo goodness!
Serve the cheesecake cups garnished with a dollop of whipped cream and a mini Oreo on top for an elegant touch.
Keyword cheesecake, dessert, no-bake, Oreo
WANT TO SAVE THIS RECIPE?


